Writing
Reading OpenJDK Code Correctly with CLion
How to handle errors that occur when trying to read OpenJDK code in CLion
When trying to read OpenJDK code in CLion, the environment turns red with errors and it becomes difficult to read. This note summarizes the steps to prepare OpenJDK code, resolve most of its errors, and make it readable.
Note that throughout this document, "OpenJDK code" refers to the JDK code provided by the OpenJDK organization. Please adjust your understanding accordingly as needed in the following sections.
NOTE
The author worked under the following environment:
- OS: Windows 11 Pro 25H2
- Editor: CLion 2026.1.3
- MSYS2: 3.6.5-0eeda3e1.x86_64
<Elevator Pitch>#
- For beginners, start here
- If you have MSYS2 and Visual Studio already, go here
- If you want a patch for
compile_commands.jsonerror resolution, see here
Step 1. Set Up Your Environment#
Step 1.b. Install MSYS2#
To read OpenJDK code, an appropriately set-up make is necessary. Setting up make requires the specific UCRT64 environment of MSYS2, so let's install it.
The home page of MSYS2 (https://www.msys2.org/) provides instructions on how to install it. You can easily install it using Winget, a package management tool that comes standard with newer versions of Windows.
PS> winget install -e --id MSYS2.MSYS2
Step 1.c. Set Up UCRT64#
After installation completes, you will see "MSYS2 UCRT64" in the start menu.
Alternatively, you can run C:\msys64\ucrt64.exe from the command line.
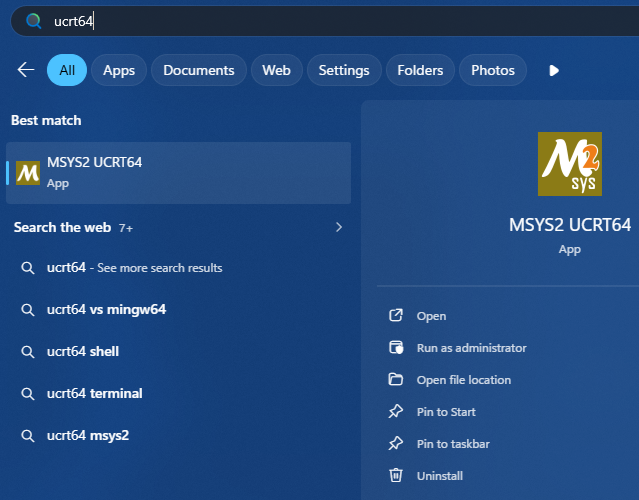
In the opened shell, execute the following commands to install dependencies required for environment setup:
$ pacman -S --needed autoconf make mingw-w64-x86_64-toolchain tar unzip zip
IMPORTANT
This command assumes an x86_64 environment.
If you are in an arm environment, replace mingw-w64-x86_64-toolchain with mingw-w64-aarch64-toolchain.
Step 2. (Optional) Set Up Build and Test Environment#
If you're reading this article, you likely want to contribute to OpenJDK. Contributing requires running unit tests and building the code, so it's recommended that you follow these steps.
Step 2.a. Install JDK for Bootstrapping#
Install a JDK as your bootstrapping JDK.
$ ./configure --with-boot-jdk=<path-to-installed-JDK>
Step 3. Tweak OpenJDK Code#
Step 3.a. Clone OpenJDK Code#
The code for OpenJDK is available in the GitHub repository (https://github.com/openjdk/jdk/). Clone it to a suitable location.
$ git clone https://github.com/openjdk/jdk/
$ cd jdk
Step 3.b. Set Up OpenJDK Code#
Now, adjust the project for your environment. Run the following command (it takes about 3-5 minutes):
$ bash configure --with-jtreg=<path-to-installed-JTReg>/lib/jtreg.jar --boot-jdk=<path-to-installed-JDK>
Step 3.c. Generate compile_commands.json#
To correctly read a large project in CLion, you need to either write your own CMakeLists.txt or use an automatically generated compile_commands.json.
The latter is more convenient.
Running the following command will generate compile_commands.json (it takes about 5-10 minutes):
$ make compile_commands
Upon completion, you should see a file named build/<architecture-name>/compile_commands.json.
Step 3.d. Patch compile_commands.json#
According to CLion's issues, there are various bugs such as improper handling of paths with spaces and incorrect handling of pathmap.
Therefore, using the patch I wrote based on JetBrains' blog post (referenced at the end of this article), run it.
Download Patch.java in the directory where compile_commands.json was generated and execute:
$ java Patch.java compile_commands.json
This will overwrite the existing compile_commands.json, generating a CLion-friendly file (the original is backed up as compile_commands.json.old).
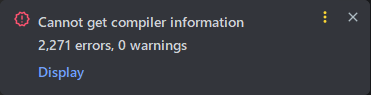
IMPORTANT
If you skip this patch, when opening in CLion, you may encounter errors like:
Step 4. Open Project in CLion#
Step 4.a. Open compile_commands.json in CLion#
Open the Explorer to build/<architecture-name>/, confirm that compile_commands.json exists, and right-click it to open with CLion.
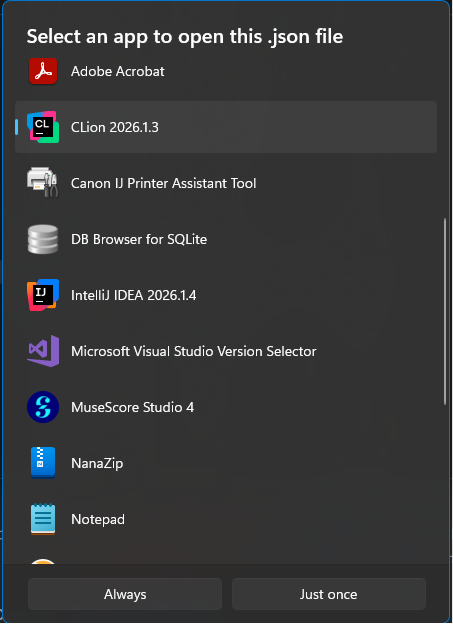
If a dialog appears asking whether you want to open as a project or file, choose "Project".
Step 4.b. Change Project Root#
In CLion → ⋮ → Tools → Compilation Database → Change Project Root, select the OpenJDK root directory (two levels up from build/<architecture-name>/).
C:\Users\<username>\Documents\OpenJDK\jdk\build\windows-x86_64-server-release
↓
C:\Users\<username>\Documents\OpenJDK\jdk
This will trigger a project re-indexing process, which should complete in due time.
NOTE
You may see the following error in the console:
Cannot determine compiler type by executable file: 'C:\Program Files\Microsoft Visual Studio\2022\Community\VC\Tools\MSVC\14.44.35207\bin\Hostx64\x64\ml64.exe'
This can be ignored.
Step 4.c. Open a Sample File#
For example, the entry point for java command is in src/java.base/share/native/launcher/main.c.
Open it and check if there are any errors around #include.
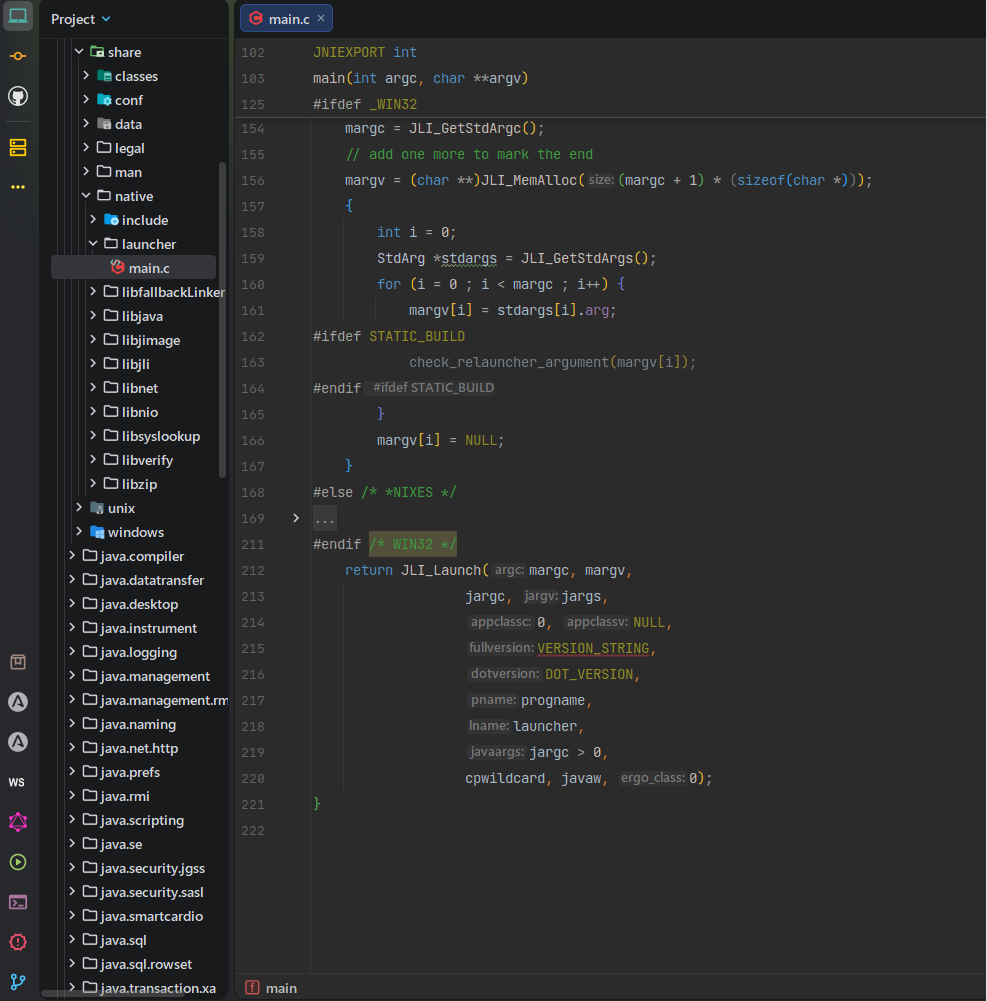
If no errors occur here, you've succeeded.
You can also look at where Java VM is created by opening src/hotspot/share/prims/jni.cpp and searching for JNI_CreateJavaVM.
Although warnings may appear, the code should be readable without any errors.
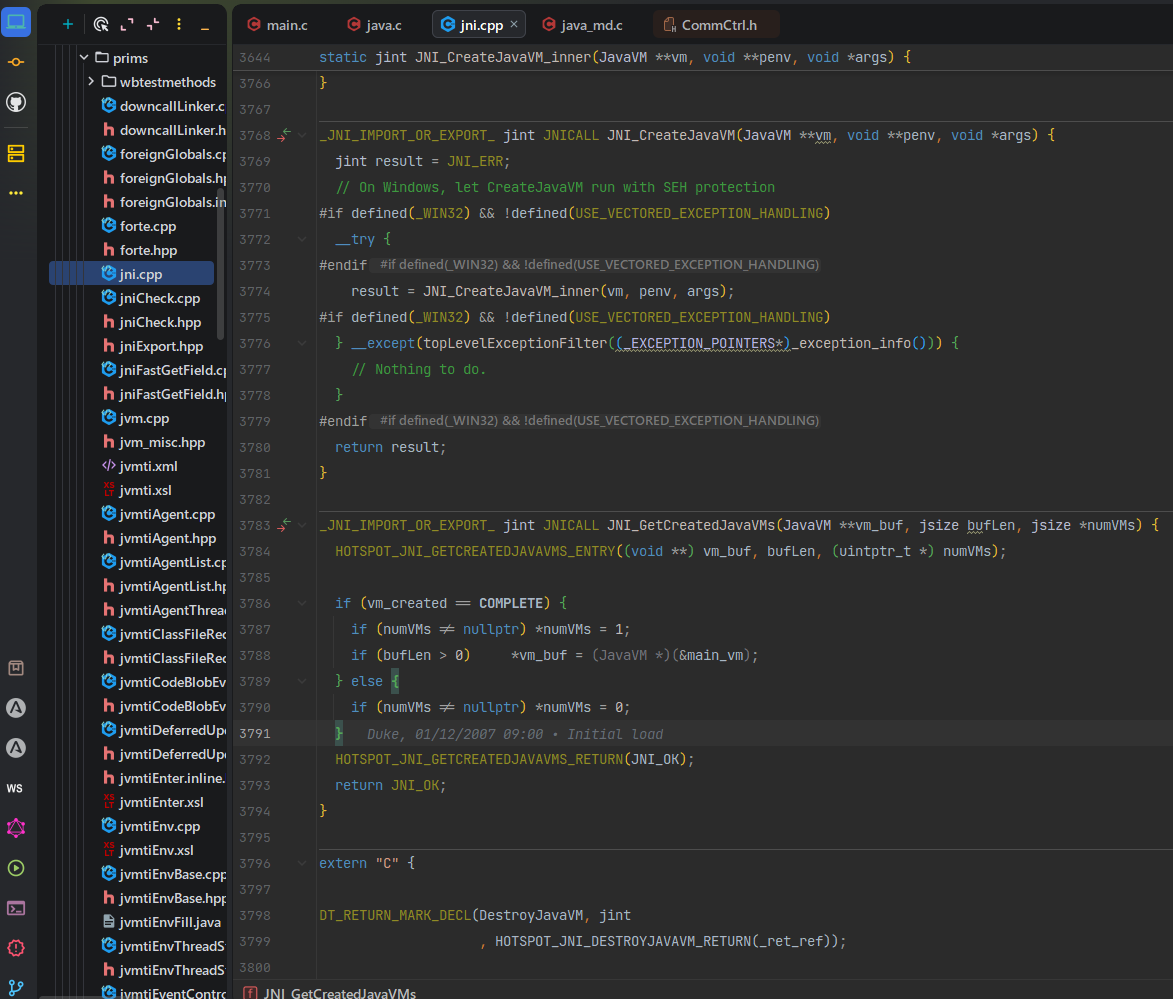
Press Ctrl+Click on a call to JNI_CreateJavaVM_inner to navigate to its definition within the same file.
Conclusion#
How was it?
To read OpenJDK code in CLion, generating and patching compile_commands.json is necessary.
Bookmark this article for future reference when you need to apply patches after cleaning and compiling.
References#
- Anastasia Kazakova, "Tips & Tricks: Develop OpenJDK in CLion with Pleasure", JetBrains Blog, 2020/03/10, https://blog.jetbrains.com/clion/2020/03/openjdk-with-clion/