Writing
[Learn the JVM by Writing Bytecode] Part 1: Getting Started with Jaspera
Write JVM bytecode by hand with Jaspera, a new web IDE for JVM assembly. Giving the JVM instructions yourself offers a closer look at how Java works. In this first installment, we cover the basics of using Jaspera.
Hello! yamad here.
I recently took part in Security Camp Mini 2026 in Aichi, where I taught a session called "Write Bytecode by Hand and Become a Java Virtual Machine!" (I'll write more about that another time.) Today, I'd like to tell you about an unexpected by-product of that session.
Have you ever wondered how your Java programs actually run? The Java source code you normally write is compiled into a sequence of instructions called bytecode, which runs on the Java Virtual Machine (JVM). That means you can give the JVM instructions directly by writing those instructions yourself.
In this new series, "Learn the JVM by Writing Bytecode," we'll explore how the JVM works by writing and running bytecode ourselves. First, let me introduce the tool we'll be using: Jaspera.
IMPORTANT
Your author is rather lazy, so there's no telling when the next installment will arrive. If something catches your interest, don't wait for an update: go ahead and investigate or experiment on your own. You're more than welcome to leave me behind!
About Jaspera#
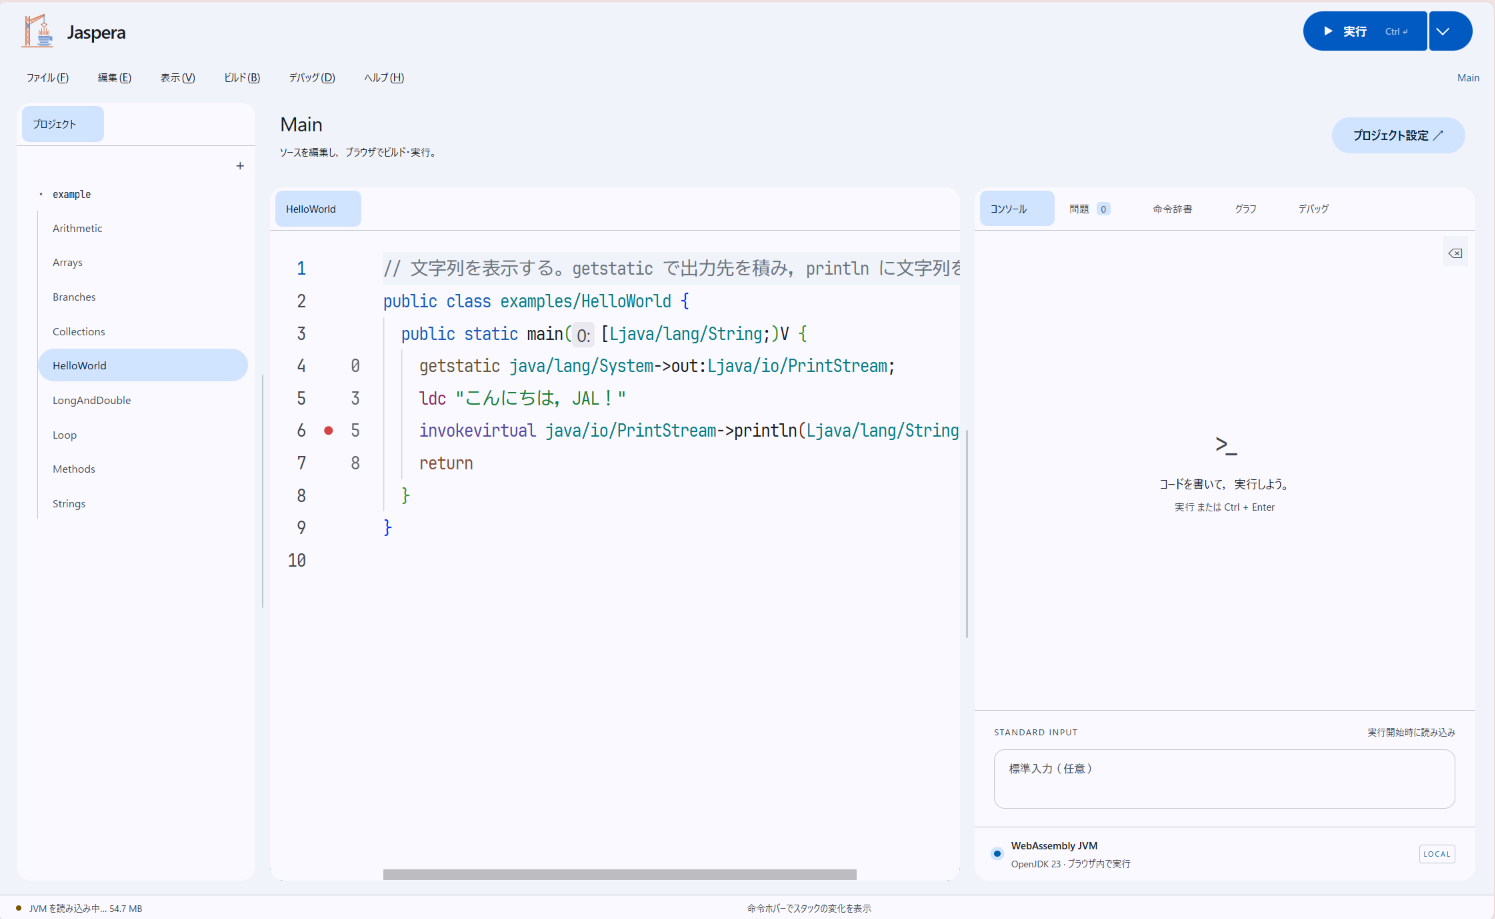
Jaspera is a new web IDE for writing and running JVM bytecode by hand. It comes with a range of coding assistance features that make it a great place to learn bytecode.
Here's what those features include:
-
Syntax highlighting: Colors instructions, labels, comments, and other parts of your bytecode.
-
Code completion: Suggests bytecode instructions and labels as you type.
-
Advanced debugger: Set breakpoints, step through instructions, and inspect variable values.
Step Into, Step Over, and Step Out are all available. -
Disassembler: Disassembles class files to show their bytecode.
NOTE
It works with the debugger: when you step into a standard library class, for example, you can view the disassembled code and step through it.
TIP
You can also drag and drop a JAR or ZIP containing class files to browse their disassembled code. After editing individual files or instruction sequences, you can save them together as a JAR or ZIP.
-
Instruction reference: Browse bytecode instructions and look up what they do and what kinds of operands they take.
Diagrams help you see how they affect the stack and local variables. -
Frame visualization: Hover over an instruction in the editor to see how it changes the frame.
Visual representations of the stack and local variables help you understand what the bytecode does. -
Multiple languages: The features above and the IDE interface support Japanese, English, Chinese, French, Spanish, Italian, and Latin. Yes, Latin.
-
Plenty of themes: Choose from dark, light, and colorful themes.
-
Offline execution: Save the IDE and its runtime (about 60 MB) to your device beforehand, and you can use it without an internet connection.
Since time immemorial, writing bytecode by hand has meant setting up an assembler such as Jasmin locally, then compiling and running your code each time. With Jaspera, you can write, run, and debug it all in your browser.
How Jaspera Came About#
For my session, I planned to have everyone write code in JAL. JAL is a new assembly language for JVM bytecode. It works with modern JVMs and has syntax that should feel familiar to Java programmers.
The Javasm plugin integrates JAL with IntelliJ IDEA, so you can write it with help from an IDE. Naturally, that was what I intended the participants to use—until about three days before the session.
As part of their preparation, I asked the participants to set up IDEA. It turned out that the latest IntelliJ IDEA was a little too feature-rich for the laptops they would be bringing. Opening a project took tens of seconds, and typing a single character could cause a brief freeze.
That wasn't going to work. After thinking through a few options, I realized I could turn the whole thing into a web IDE.
I hurriedly handed the entire Javasm codebase to GPT-6 Astra and asked it to have a go. About 40 minutes later, I had something that looked the part. I kept refining it until it became the Jaspera you see today. The whole process took one night.
When we used it during the session, the participants and tutors responded positively. That made it feel worth building—although the AI was the one that actually wrote the code 😂.
Let's Try Jaspera!#
Now, on to the main event.
First, visit https://jaspera.yamad.jp. Once it finishes loading, the theme selection screen appears. Pick whichever theme you like.
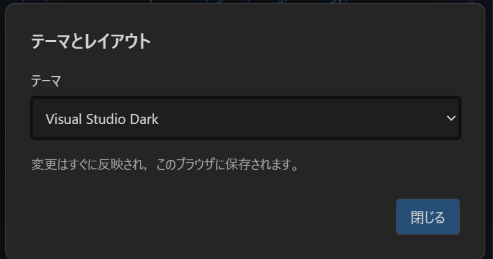
(The language is selected automatically based on your device's settings. If it isn't the one you want, press Alt + V and use the last item in the menu to change it.)
Hello, World First!#
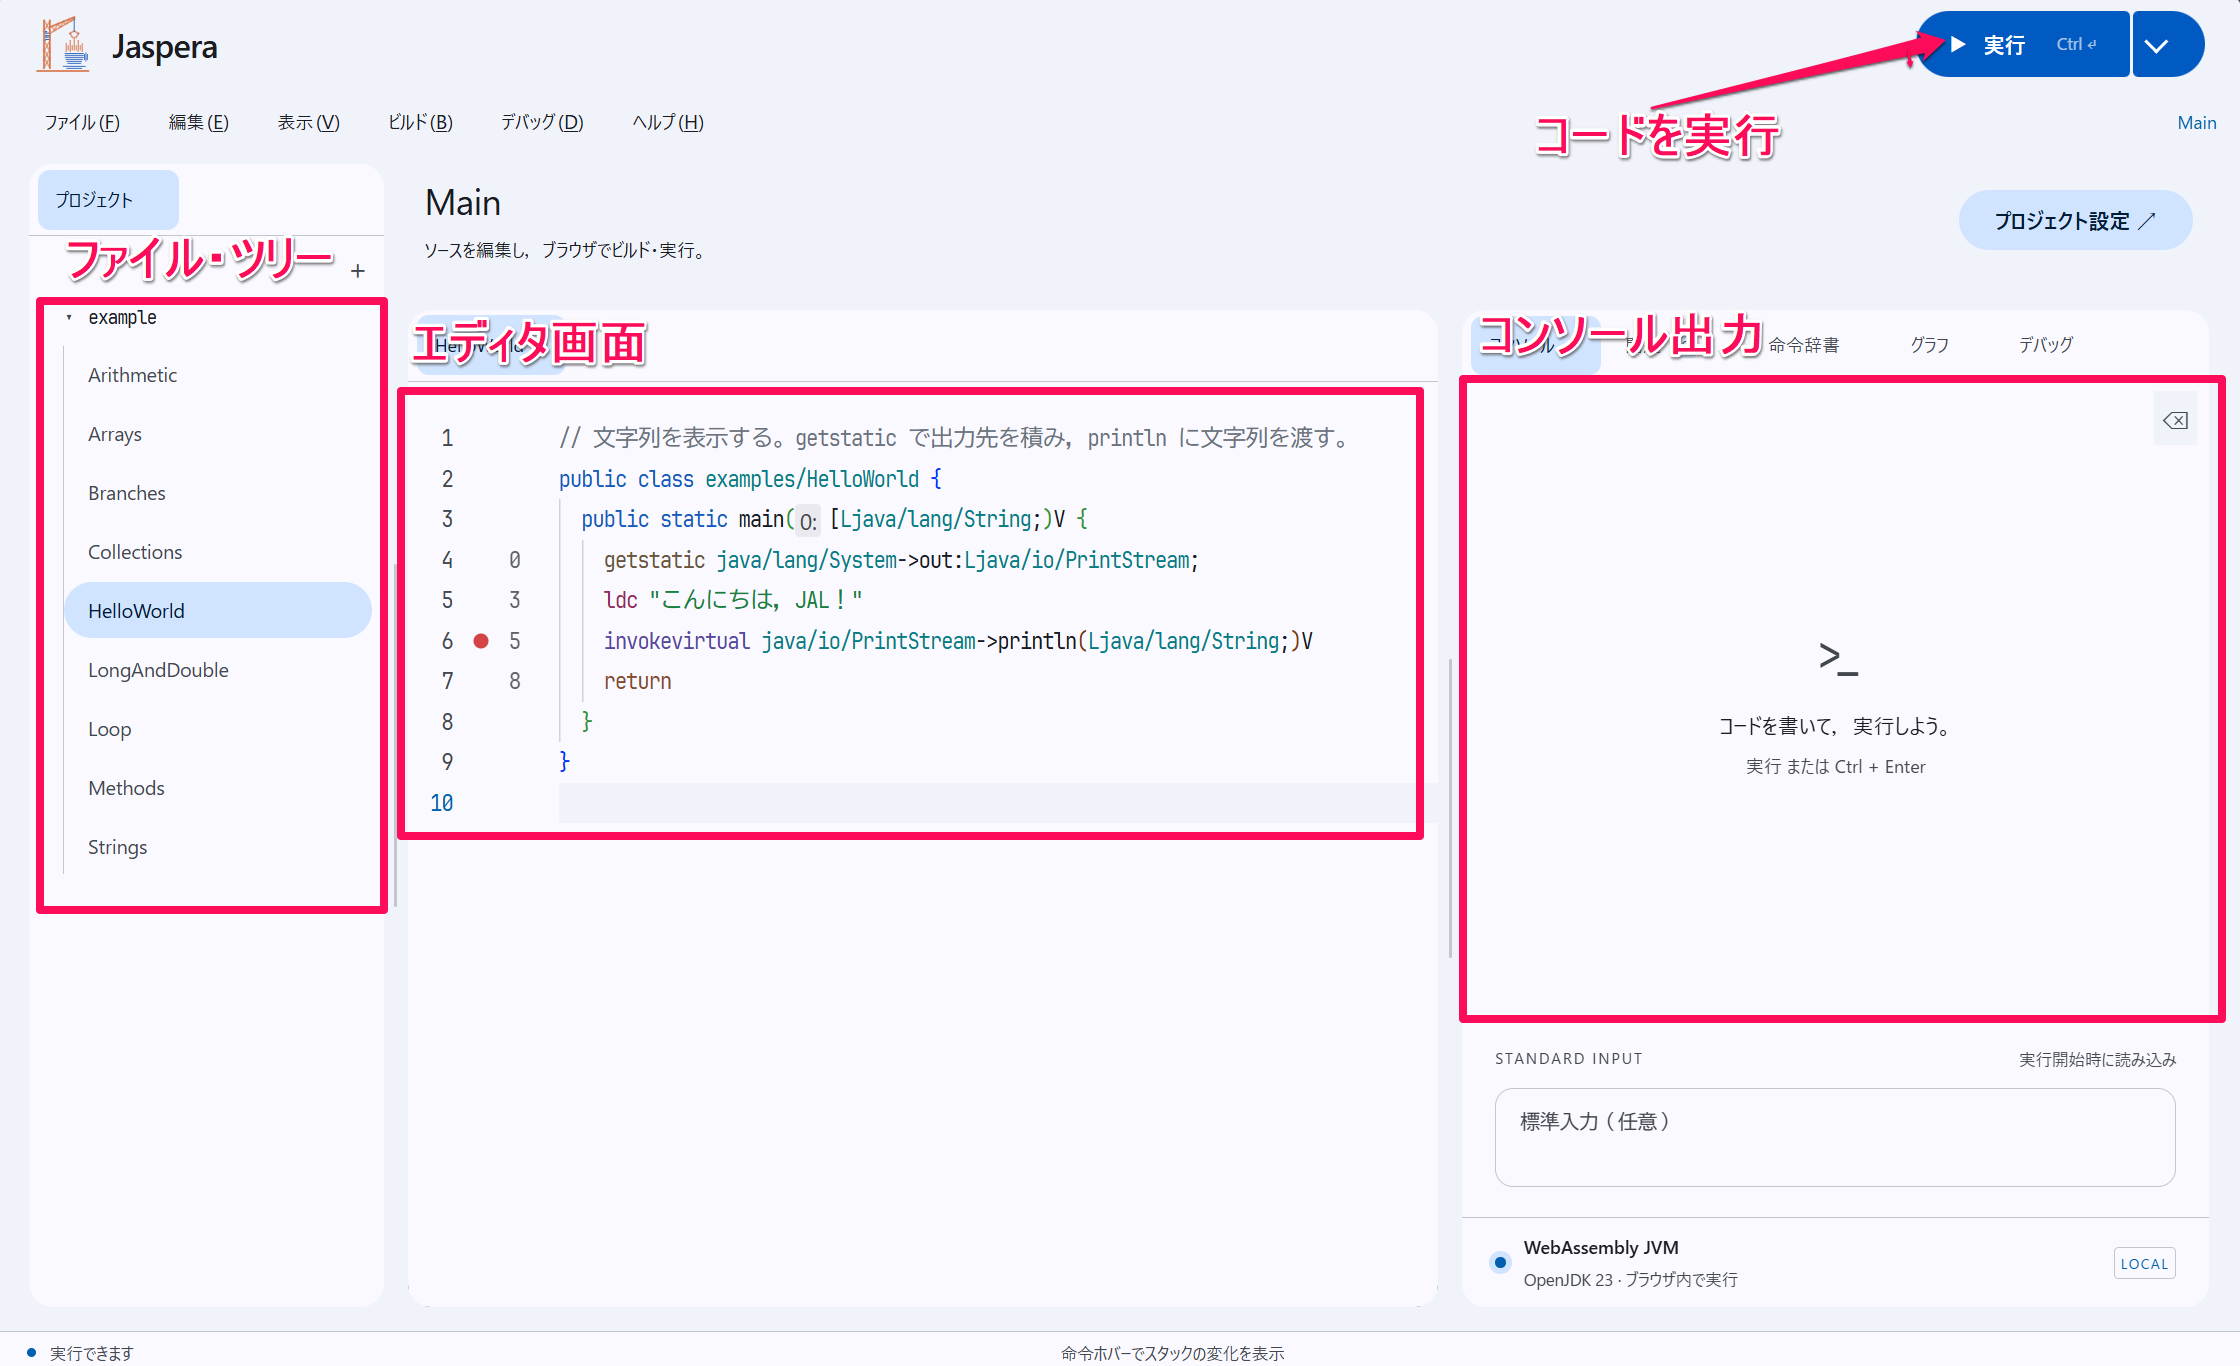
When you open Jaspera, you'll see several sample source files in the file tree on the left.
HelloWorld.jal should already be selected, with its source code displayed in the editor.
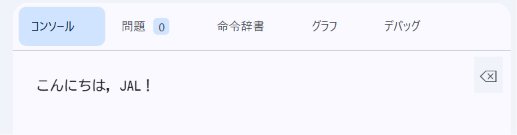
Let's run it. Click Run in the upper-right corner or press Ctrl + Enter to execute the current code:
Understanding Instructions: The Instruction Reference#
If you're new to JVM bytecode, you may have no idea what a particular instruction does. That's why Jaspera includes an instruction reference with detailed explanations of the selected instruction. Open the Instructions tab on the right.
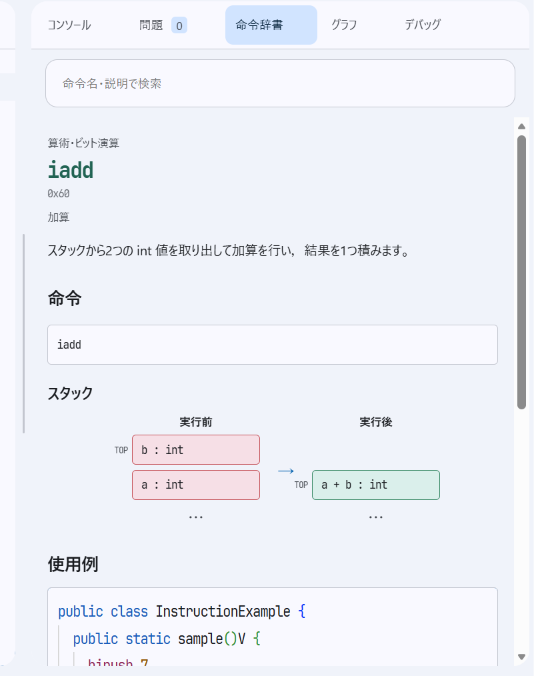
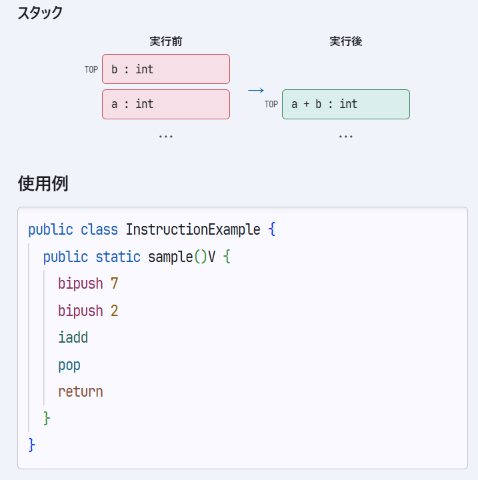
Along with a short explanation and usage examples, the reference includes diagrams showing how executing the instruction changes the frame. (We'll get to frames in a moment.)
TIP
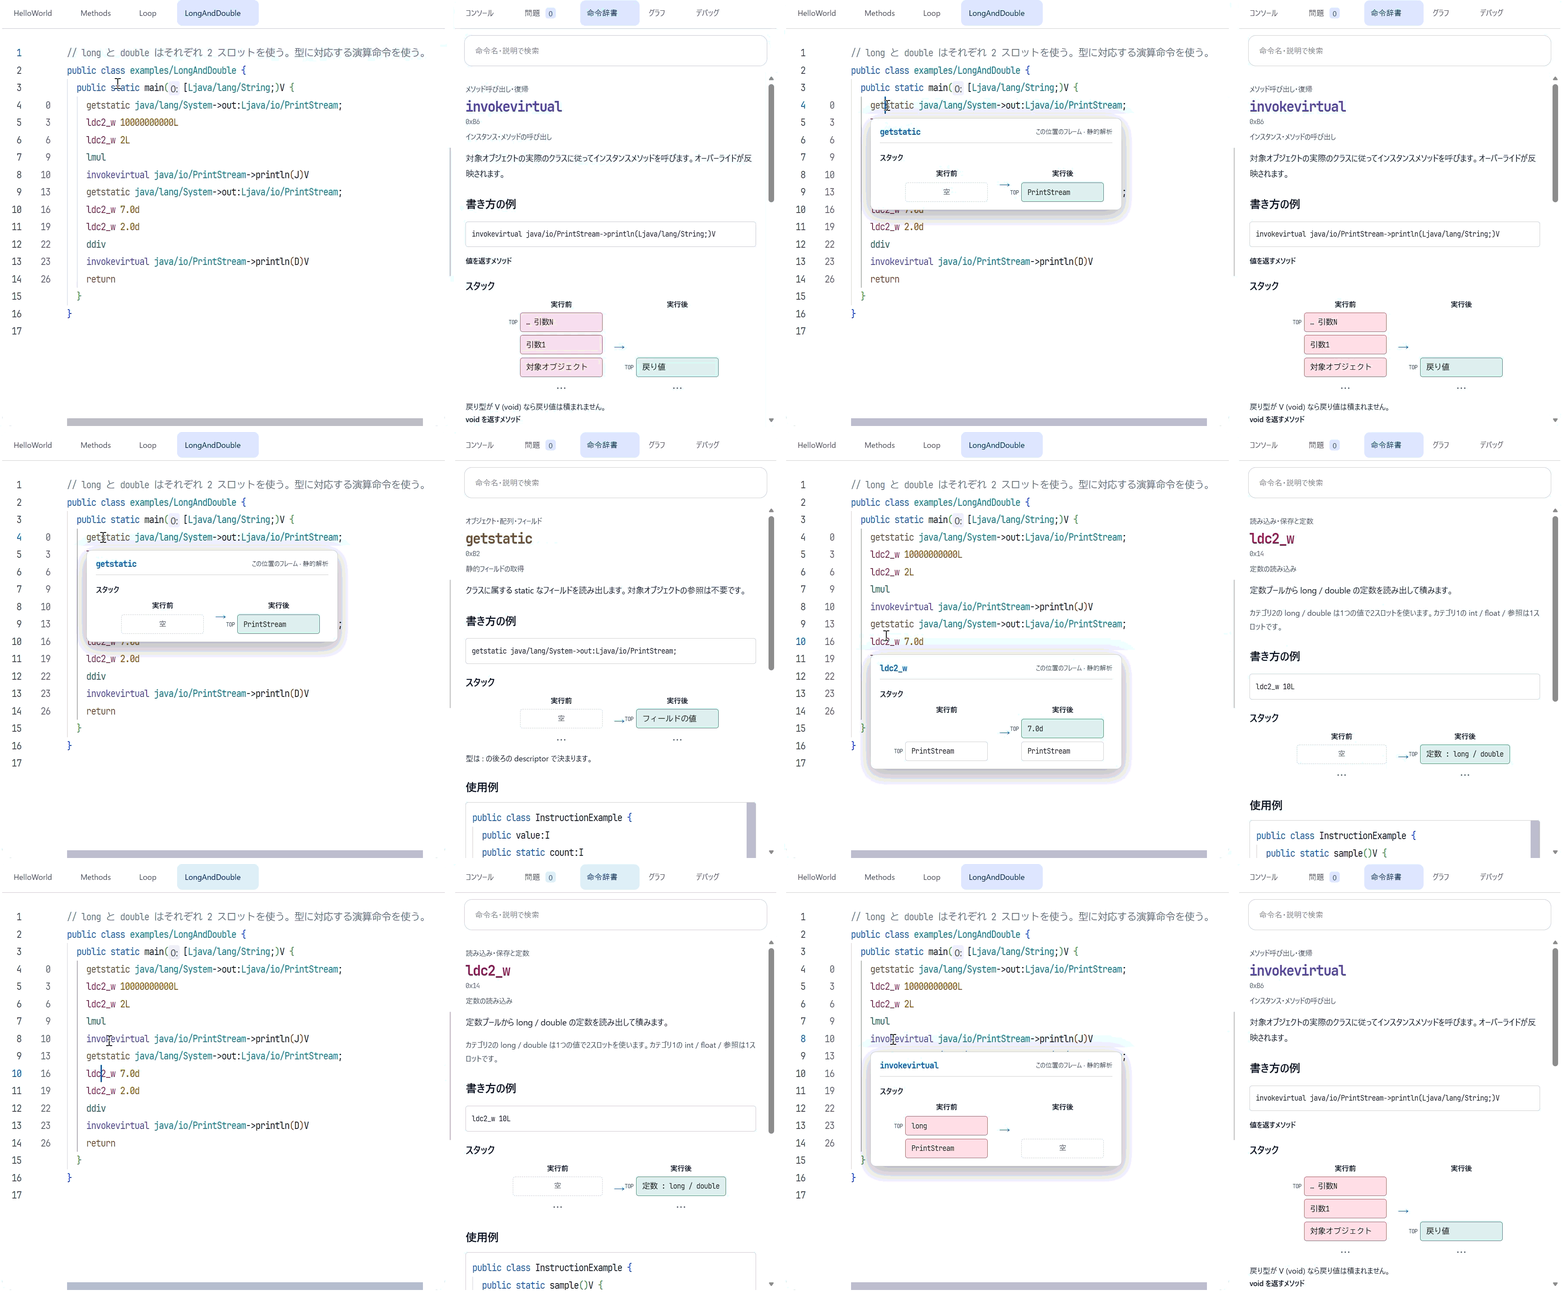
Clicking an instruction in the editor opens its reference entry, too!
Understanding Instructions: Frame Visualization#
Hover over an instruction in the editor to see how it affects the frame.
NOTE
A frame is a workspace used to execute a method. Its main components are the operand stack and the local variable array. The operand stack is a stack used to supply and receive the data that instructions work with.
Most instructions push values onto or pop values off the operand stack, while a smaller set works with the local variable array. You can think of it as using the operand stack to perform calculations and storing the results in the local variable array.
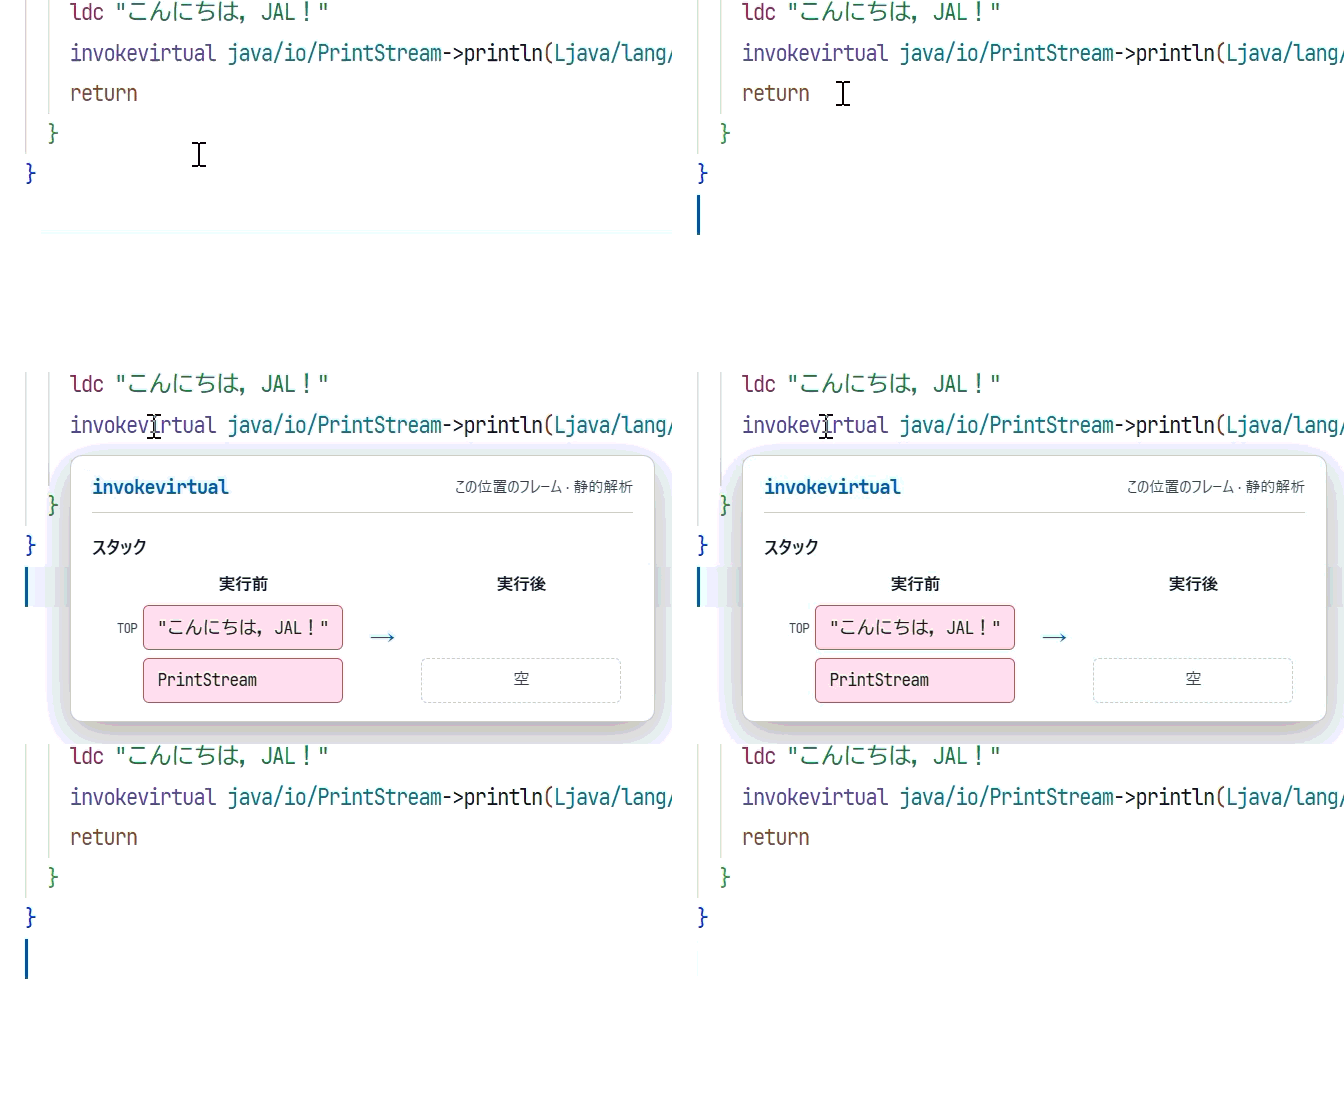
Hover over invokevirtual, and you can see at a glance that the PrintStream object and the string argument are taken off the stack. Strictly speaking, the stack holds references to those objects, and it is those references that are removed.
Understanding Instructions: Using the Debugger#
The debugger lets you pause at breakpoints and use stepping to execute instructions one at a time.
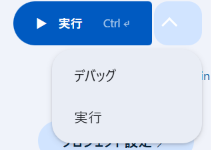
Open HelloWorld, click the arrow to the right of the Run button in the upper-right corner, and choose Debug from the menu.
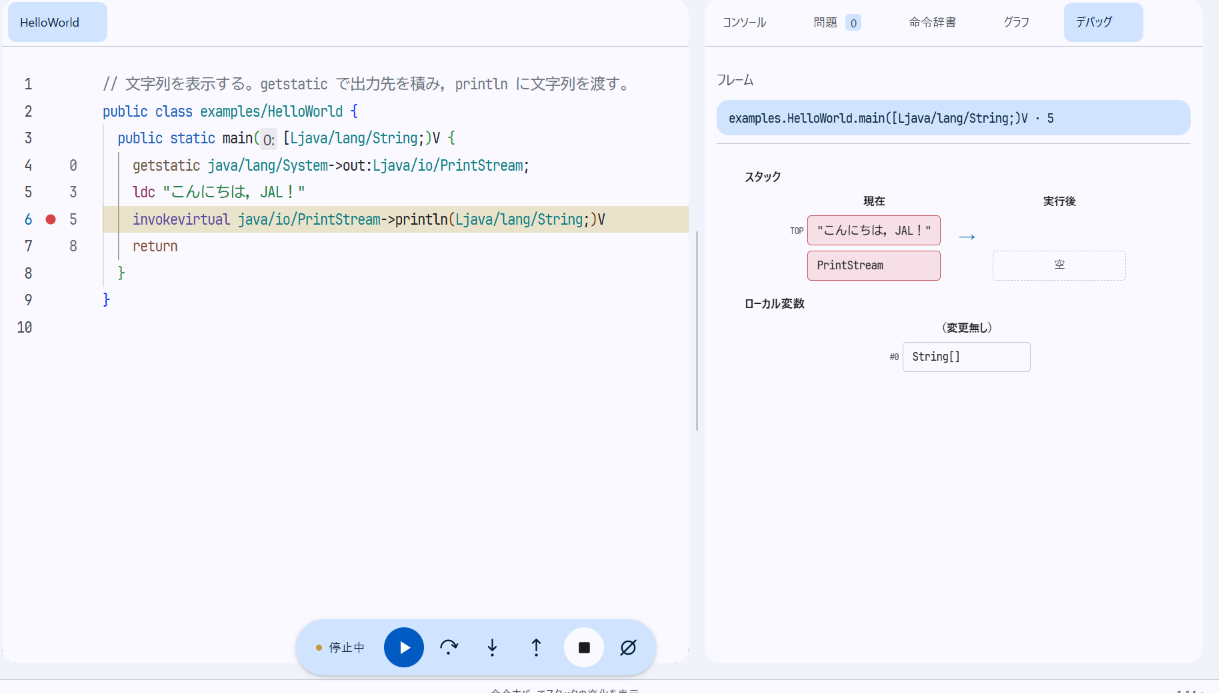
Debugging starts, and execution pauses at the breakpoint on the invokevirtual instruction.
NOTE
A breakpoint pauses execution at a particular line or point in the program.
While paused, you can inspect variables and think through what's happening to track down a bug.
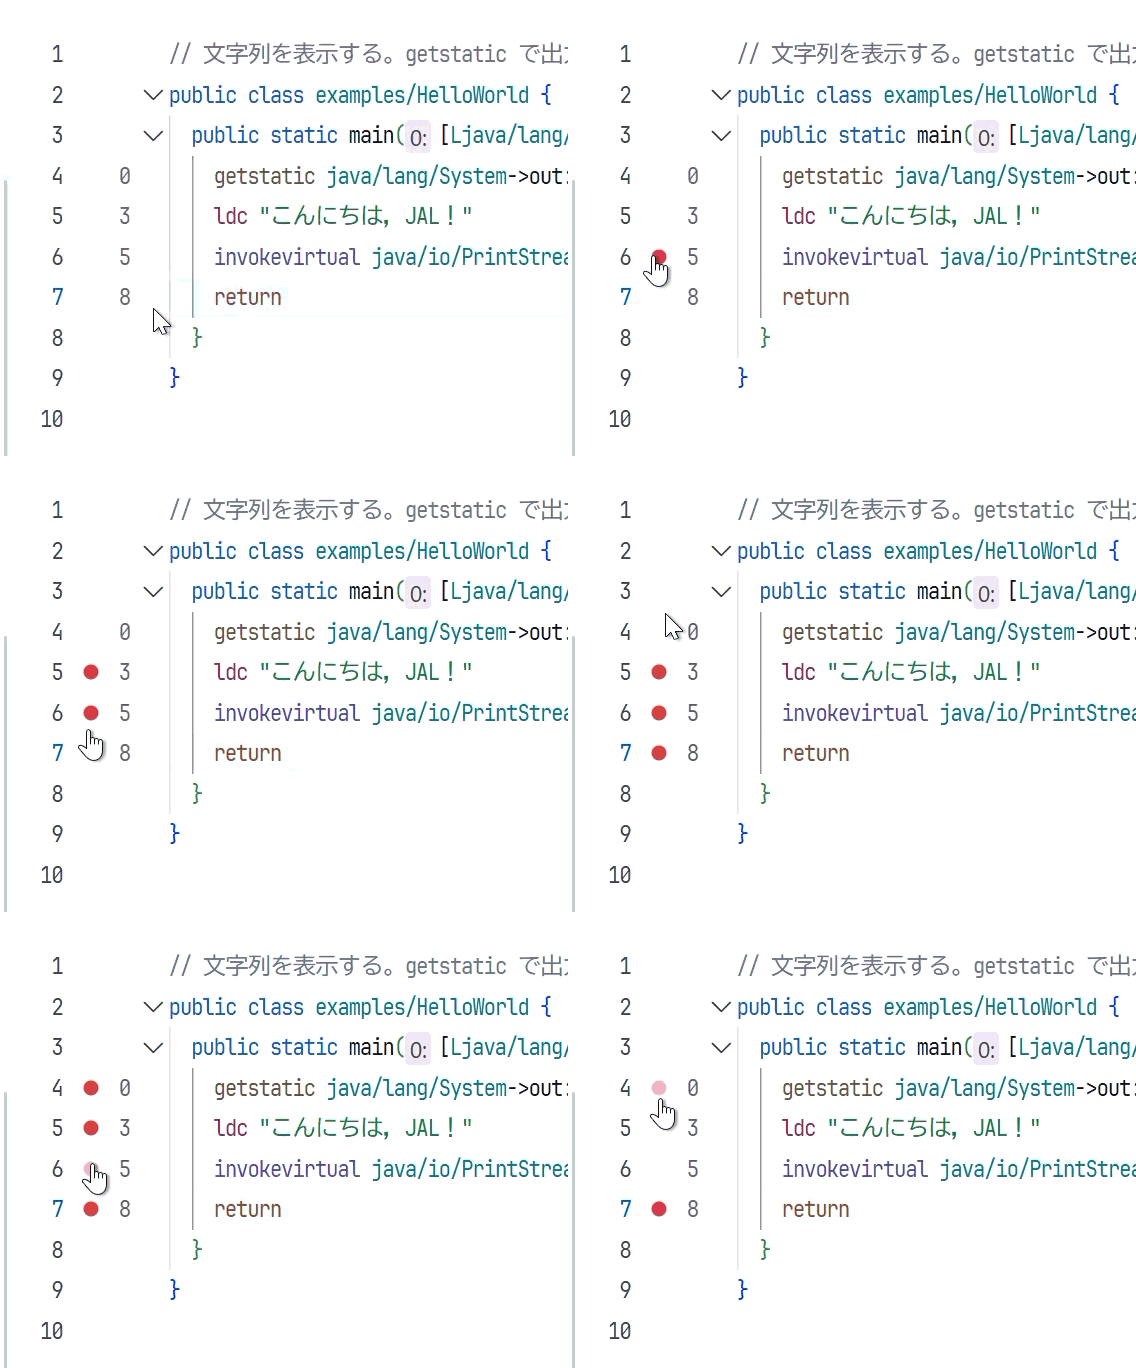
In Jaspera, click between the line number and the instruction offset to add or remove a breakpoint.
While debugging, you can use the controls at the bottom of the screen:
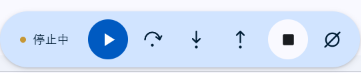
From left to right, they are:
- Resume: Continue execution after a pause, such as at a breakpoint.
- Step Over: Advance to the next instruction. If the instruction calls a method, run the call as a single step and pause when it returns.
- Step Into: When paused at a method call, enter that method and pause inside it.
- Step Out: Continue until the current method returns, then pause in the caller.
- Stop: Stop the program.
- Ignore Breakpoints: Run without stopping at any of the breakpoints you have set. This is a toggle.
Step Over#
Let's execute the instructions one at a time and watch the state change. While paused at a breakpoint, click the second button from the left…
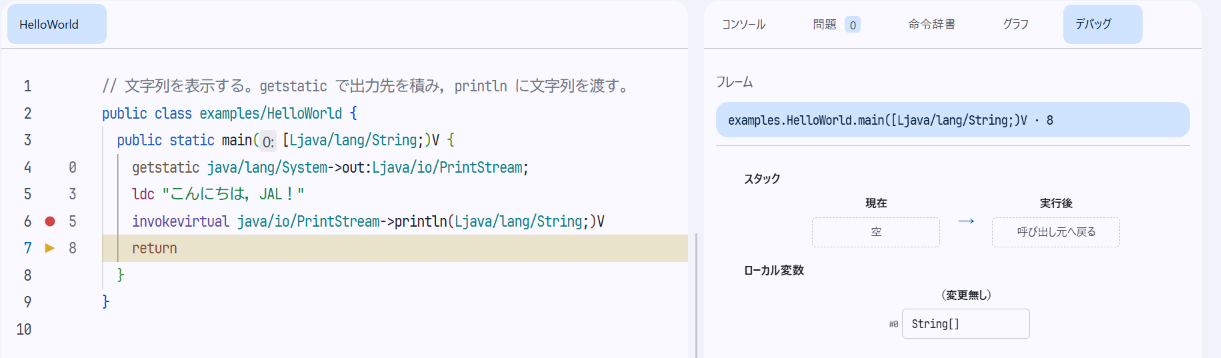
The instruction at the breakpoint executes, and the program pauses again at the next instruction. You can also see that the frame's state has changed in the Debug panel on the right.
Step Over lets you check each instruction as you execute it.
Step Into / Step Out#
Step Into advances execution to the next instruction. When used on a method call, it enters the called method and pauses there:
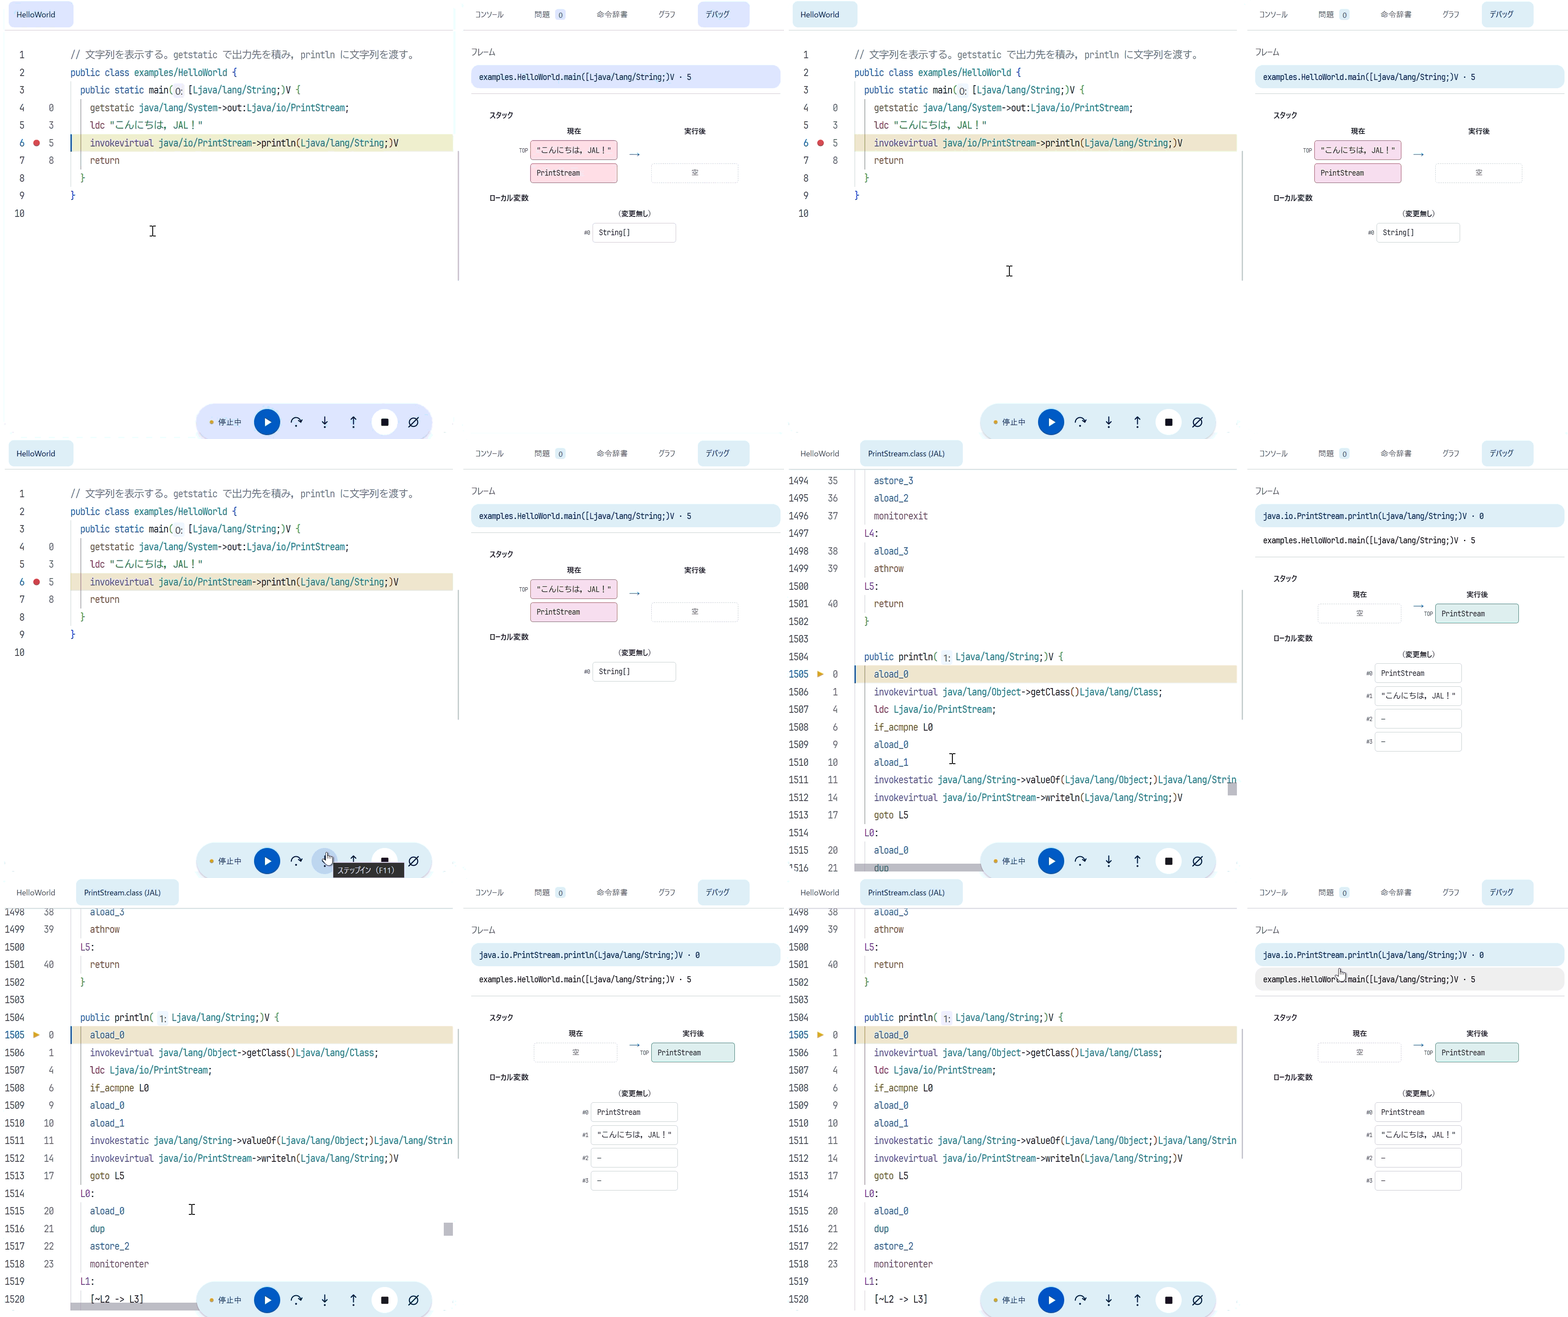
NOTE
When you step into a method, Jaspera displays its JAL code. If the method comes from the standard library or an external class file, it is automatically disassembled into JAL.
To return from the method you entered, use Step Out.
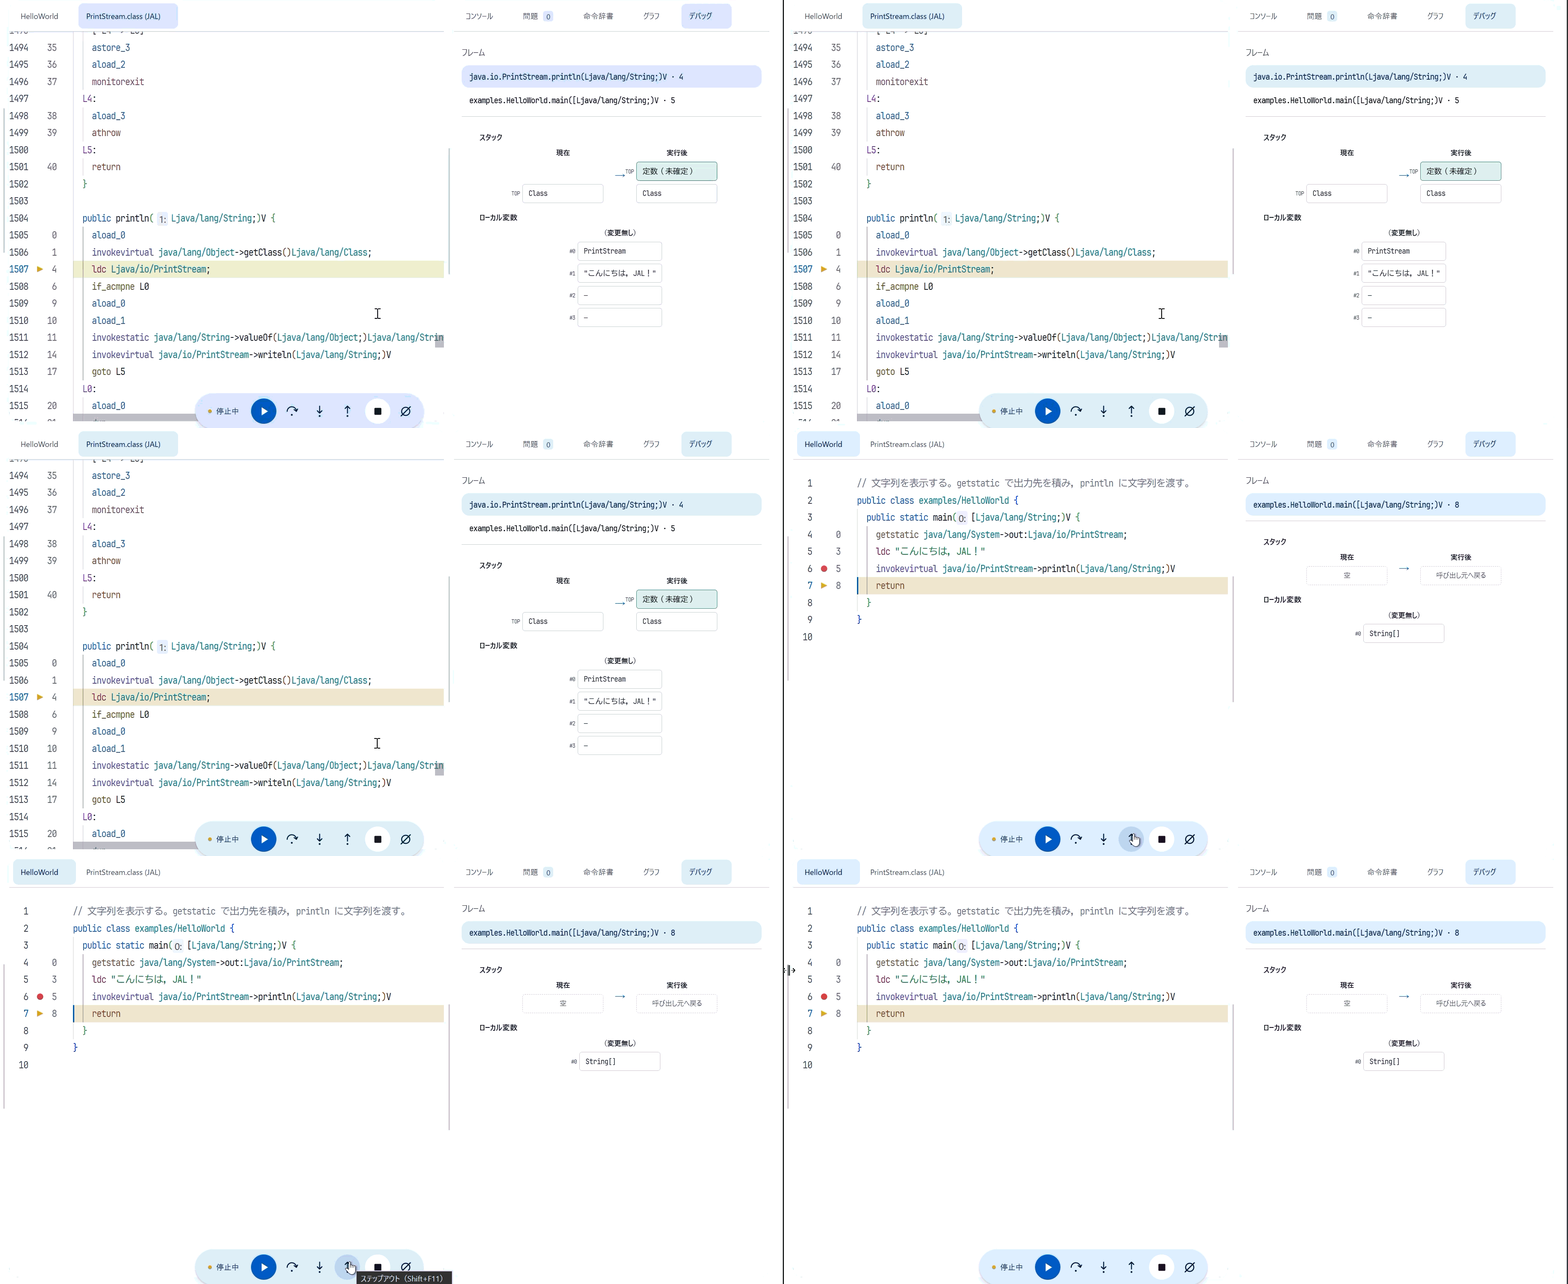
Execution continues until the current method returns, then pauses again in the caller.
Let's Write a Program!#
Now that you know your way around, let's write some instructions ourselves. This time, we'll calculate 2 + 3 and print the result.
Open HelloWorld.jal and replace the body of main with the following.
Leave the class and method declarations as they are.
getstatic java/lang/System->out:Ljava/io/PrintStream;
// ...
// ...
iadd
invokevirtual java/io/PrintStream->println(I)V
return
As it stands, we haven't pushed the values that iadd needs onto the stack.
It looks like we'll need to put some instructions where those comments are.
Take a look at the other examples and the instruction reference, and see if you can fill in the gaps! (We'll compare answers another time.)
Closing Thoughts#
Today, I introduced Jaspera, a tool for writing and running JVM bytecode by hand in your browser. I built it in a hurry for a teaching session, but I'd be happy to see people beyond that group use it, too.
When writing Java, you might not often think about pushing values onto a stack or popping them off. Writing the instructions yourself and executing them one at a time might give you a different view of the programs you write every day.
Give handwritten bytecode a try, and find out what it feels like to be a Java Virtual Machine.
Until next time, enjoy life as a JVM!